How to Set Up Volunteer Shifts and Options
Volunteers are the backbone of every consignment sale. This guide shows you how to create shifts, bulk-generate schedules, define job roles, and set up hour tiers with perks so helpers can sign themselves up.
Open the Shifts Tab
Navigate to your sale and click the Shifts tab. The label matches your custom volunteer label, so it might say "Helper Shifts" or "Team Shifts."

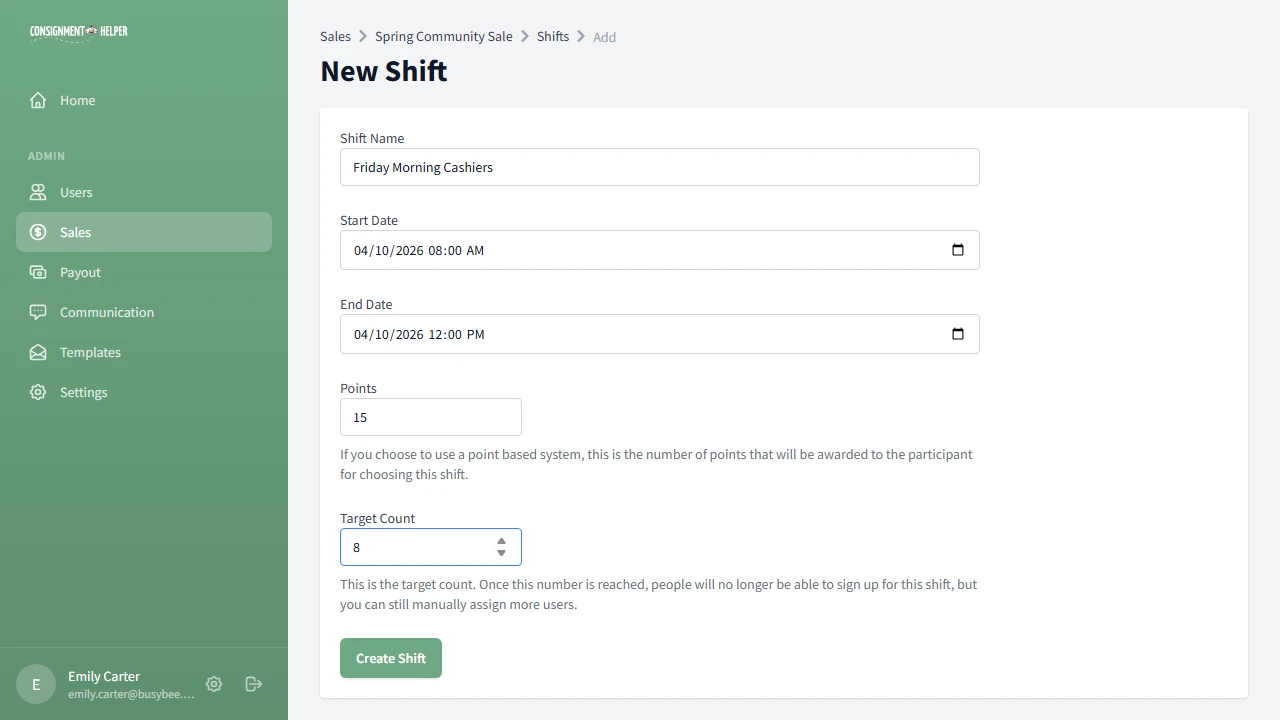
Create a Shift
Click Add Shift and fill in:
- Shift name, something descriptive like "Friday Morning Cashiers"
- Start and end time for when the shift runs
- Points: a value (0 to 100) for tracking volunteer contributions
- Target: how many volunteers you need for this shift
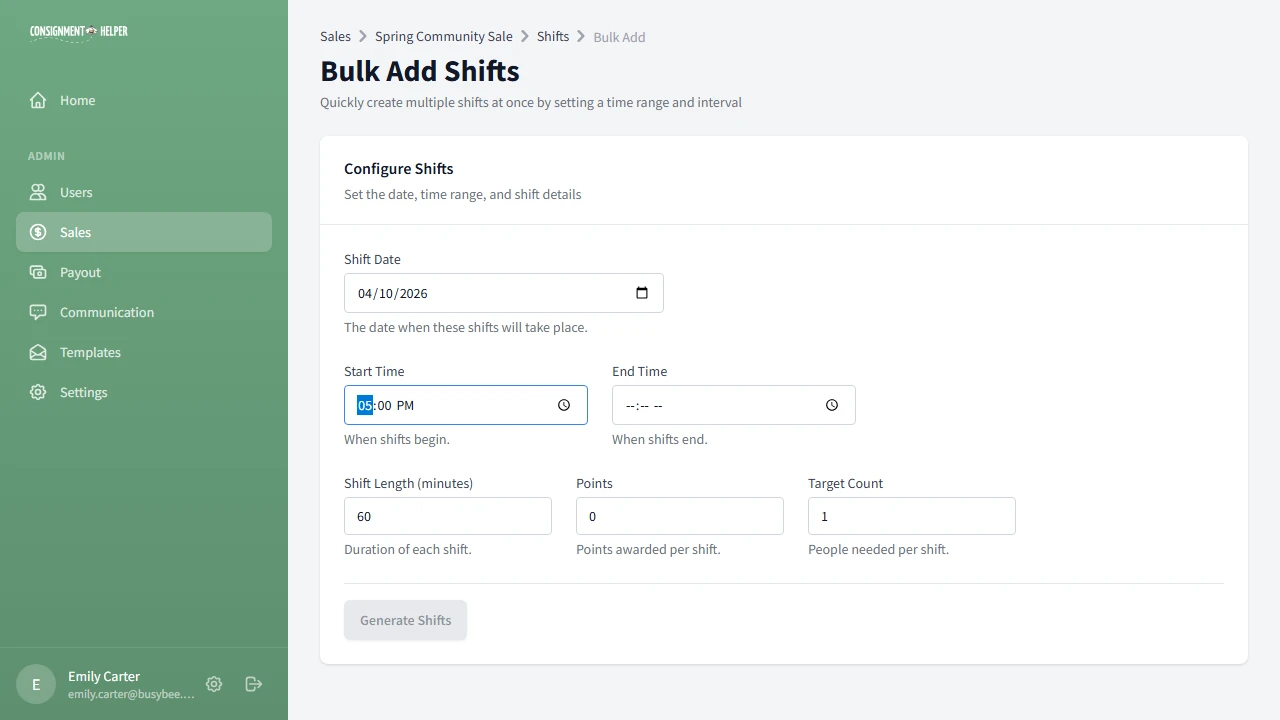
Bulk-Create Shifts
For multi-day sales, creating shifts one at a time gets tedious fast. The Bulk Add tool lets you generate an entire day of shifts at once. Learn more about bulk shifts.
Set the date, start time, end time, and interval (e.g., 60 minutes). The system generates a shift for every interval. For example, 9 AM to 5 PM with 1-hour intervals creates 8 shifts automatically.
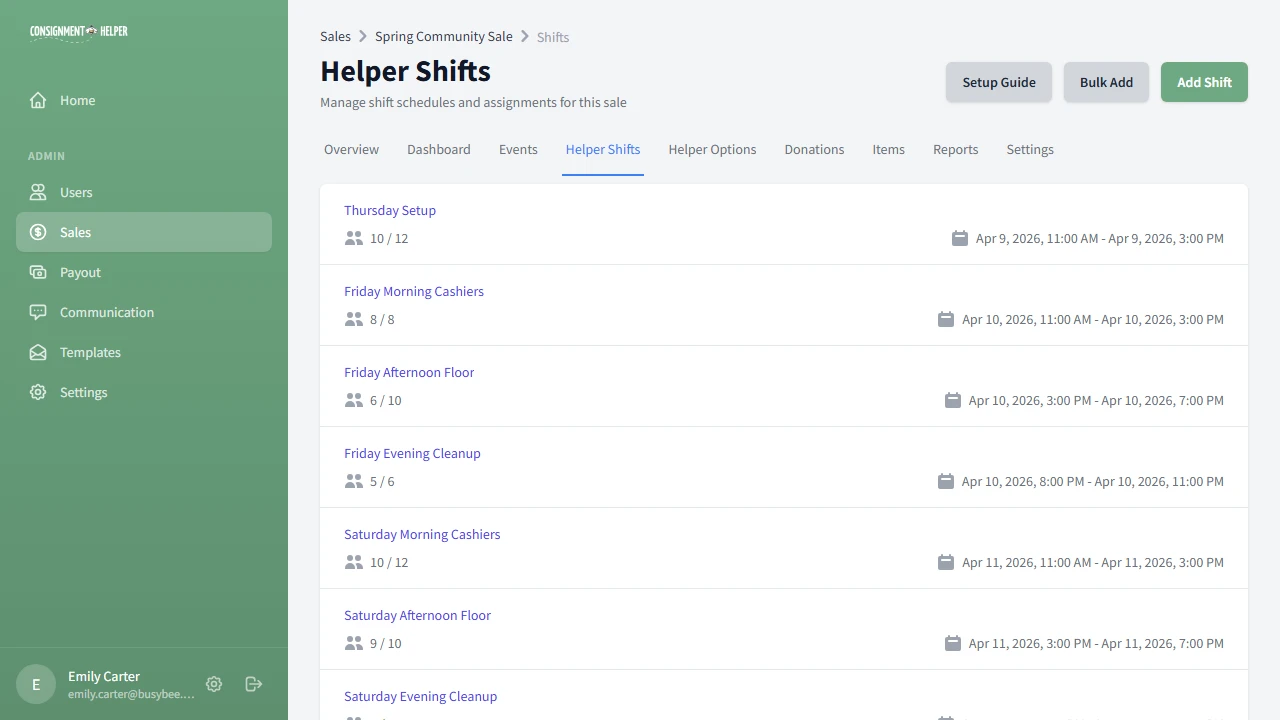
Review Your Shifts
Your shifts list now shows every shift with its date, time range, and how many volunteers have signed up compared to the target.
Click any shift to see its details, manage participants, and add job roles.
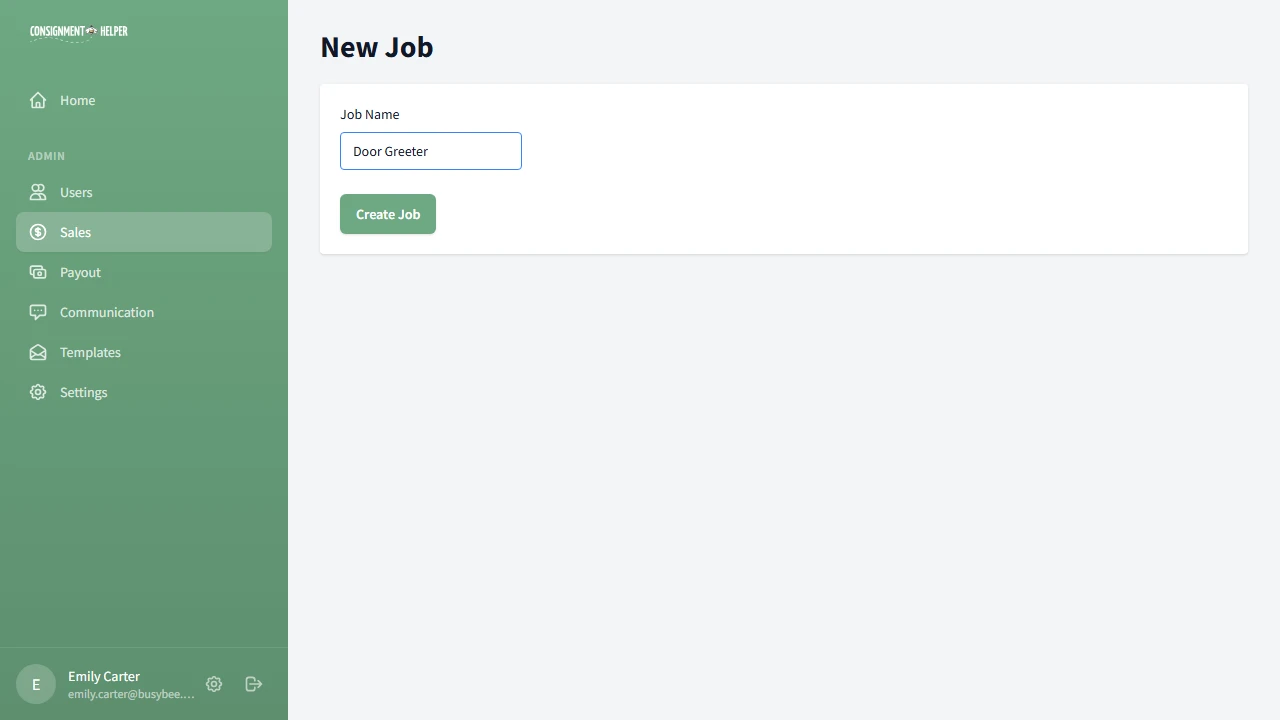
Add Job Roles
Within each shift, you can define specific jobs so volunteers know exactly what they'll be doing. Click into a shift and add roles like:
- Cashier: runs the POS checkout
- Door Greeter: welcomes shoppers
- Sorter: organizes items by category
- Runner: restocks and helps shoppers
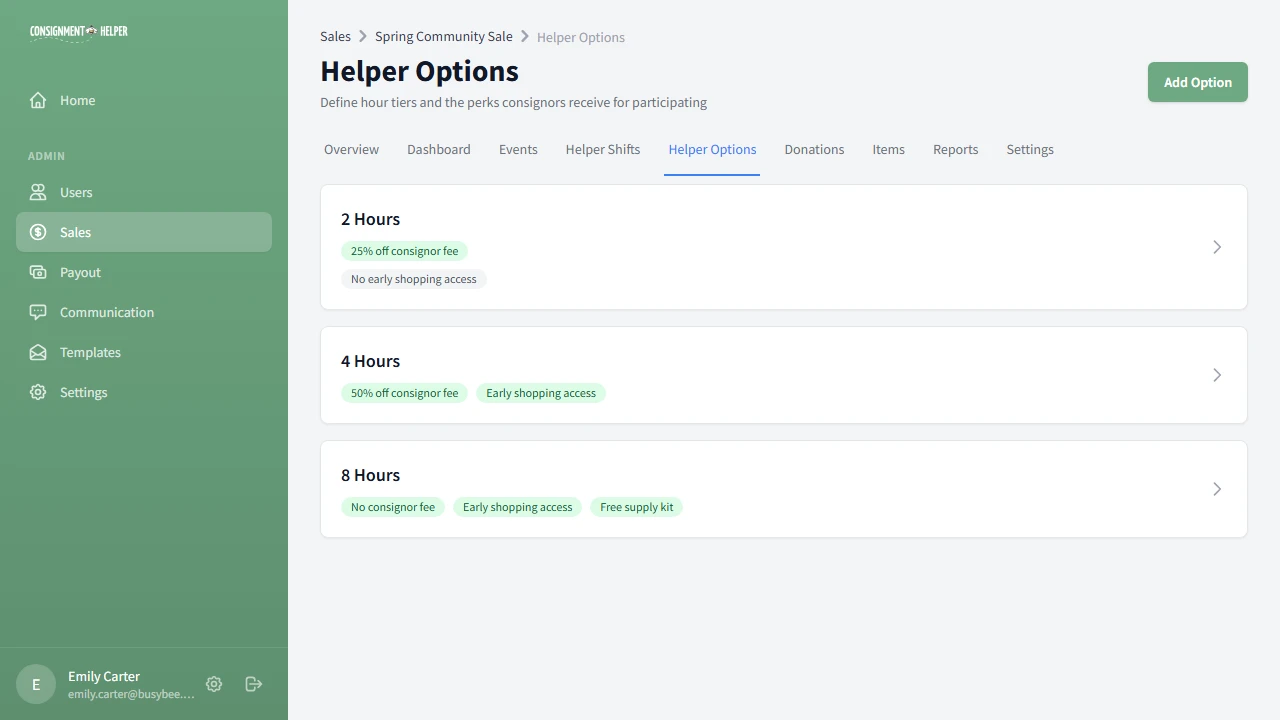
Open Volunteer Options
Click the Volunteer Options tab. The label matches your custom name, so it might say "Helper Options." This is where you define hour commitment tiers that volunteers choose from during registration. Learn more about self-service sign-up.
Think of volunteer options as "packages." Each one has a minimum hour commitment with corresponding perks or trade-offs.
Create a Volunteer Option
Click Add Option and set the minimum hours. Then add perks and disadvantages to make each tier appealing (or honest about the trade-offs).
For example, a 4-hour option might include:


Review Volunteer Options
Your options list now shows every tier with its hours, perks, and disadvantages. During registration, volunteers will see these options and choose the one that fits their availability.
You can edit or delete options at any time. The dashboard will show you the distribution of which tiers volunteers are choosing.
You're Ready to Go Live
With your sale created, events configured, and volunteer options set, head to Sale Settings and switch your sale to Public. Consignors can start registering right away.
Common Questions
What are points for?
Points are a way to track and compare volunteer contributions across shifts. A longer or more demanding shift can be worth more points. They're optional. You can set them all to zero if you prefer not to use them.
Do I need job roles?
Job roles are optional but helpful for larger events where volunteers need clear assignments. For small sales where everyone pitches in on everything, you can skip them entirely.
How many volunteer option tiers should I create?
Most sales create 2-3 tiers (e.g., 2-hour, 4-hour, 8-hour). Each tier should have distinct perks so volunteers can choose the commitment level that fits their availability. One tier is enough if all volunteers commit to the same number of hours.
Need a Hand?
Our team is happy to walk you through the setup process. Schedule a free demo and we'll get you up and running.